In this post, we have complete instructions and created a few different methods on whether you can use them to create and restrict Google API Keys.
If you want to use your own Google Maps API keys with Migrateshop. Initially, you must have to create API key(s) from the Google developer account and enable APIs.
- Google Maps JavaScript API (required)
- Google Maps Geocoding API (required)
In Migrateshop, the API key(s) are needed to show the map in the Admin or on an interface and geocode locations when uploaded. Since using Google API keys can involve costs, we advise making 2 distinct keys and securing each with restrictions to prevent unauthorized use. The keys can be secured with HTTP, IP, and API restrictions. Every key you will need performs a unique function, and necessitates a certain set of limitations (if you choose to restrict your keys). A key can be limited in 3 different ways:
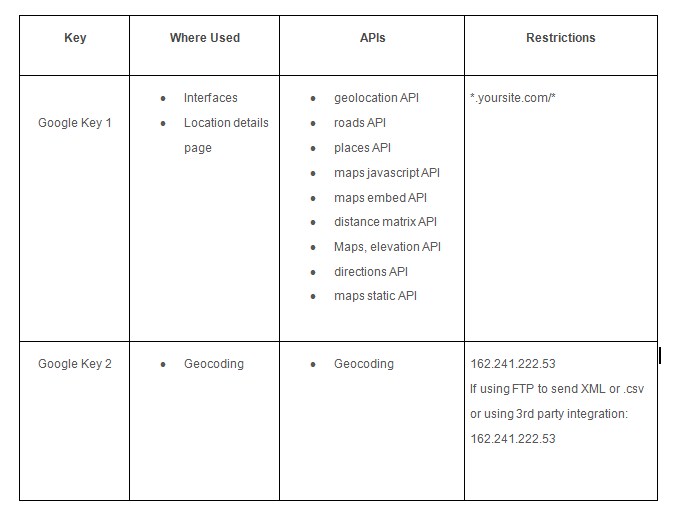
- HTTP referrers – It can be used to restrict specific URLs where the map will be shown. Migrateshop uses the Google Maps Javascript API and the Google Geocoding API with this key to display the map on the Location Details page in the Migrateshop Admin and the interface itself, so you would restrict these keys to *.yoursite.com/*, also to your own domains anywhere the map displayed.
- IP addresses – The other key you’ll need can only be used on specific IP addresses of the servers that geocode locations when uploads. Migrateshop uses the Google Geocoding API with this key to geocode locations during CSV and XML uploads, so you would restrict this key to our servers at 162.241.222.53.
- API services – Either key can be further restricted to permit only the Google API services needed for the functionality required. For example, for these instructions that are common for use with Migrateshop, we’ll create one key that uses the Google Maps Javascript API and the Google Geocoding API to support displaying maps in the Admin and interface, and one key that uses the Google Geocoding API to support geocoding.
If you want to use your own keys, we offer a summary and complete instructions below:
API Key Restriction Summary
Instructions
- Create an Account
- Create a Project
- Enable APIs
- Create API Key(s)
- Restrict Keys (optional)
- Add keys to Admin panel
Create an Account
You will require to have a Google account (Gmail account) when you create your Developer’s account/Cloud Console, which is essential to create API keys. These steps are based on the assumption that you have a paid developer’s account, have given payment details, and are using a standard Migrateshop interface.
Note: If you have a trial account, you can upgrade in your Google Cloud Platform Console by clicking on the Activate button at the top of the page. If you do not see Activate, click Free trial status in the upper-right of the page, and Activate will appear.
You will not be billed unless you exceed the quota for the Javascript API or Geocoding API. (At the time of writing, the quota is 28,000 dynamic maps per month for the Javascript API and 40,000 geocodes per month for Geocoding your locations).
Check the below articles for Billing/Quota information and upgrading your account (for billing you need to provide your credit card details):
Direct link to Google Cloud Billing page
https://console.cloud.google.com/projectselector2/billing/enable?pli=1
https://developers.google.com/maps/documentation/javascript/usage-and-billing
https://developers.google.com/maps/documentation/geocoding/usage-and-billing
https://cloud.google.com/maps-platform/pricing/sheet/
https://cloud.google.com/free/docs/gcp-free-tier#how-to-upgrade
Create a Project
Log in to the Google APIs manager at https://console.developers.google.com/apis with a valid Google account. (You will be asked to accept updated terms of service).
Select New Project:
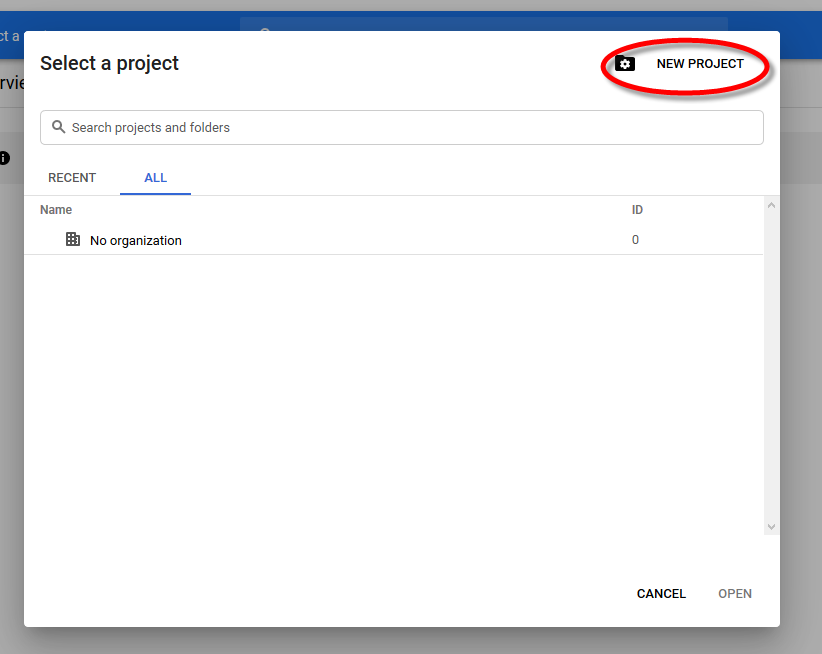
It will have the fields to name your project, and choose an organization. You also have the choice of creating a project ID under the project name:

You may use the default names or IDs or enter your own. When you complete the process you can select Create.
You will get the notification, once the project is created.

Click “View” to go to the Project page. Or click on the Project drop-down any time to select from your available projects:

Enable APIs
On the project page, scroll down and select Explore and enable APIs below the Getting Started caption on the left:
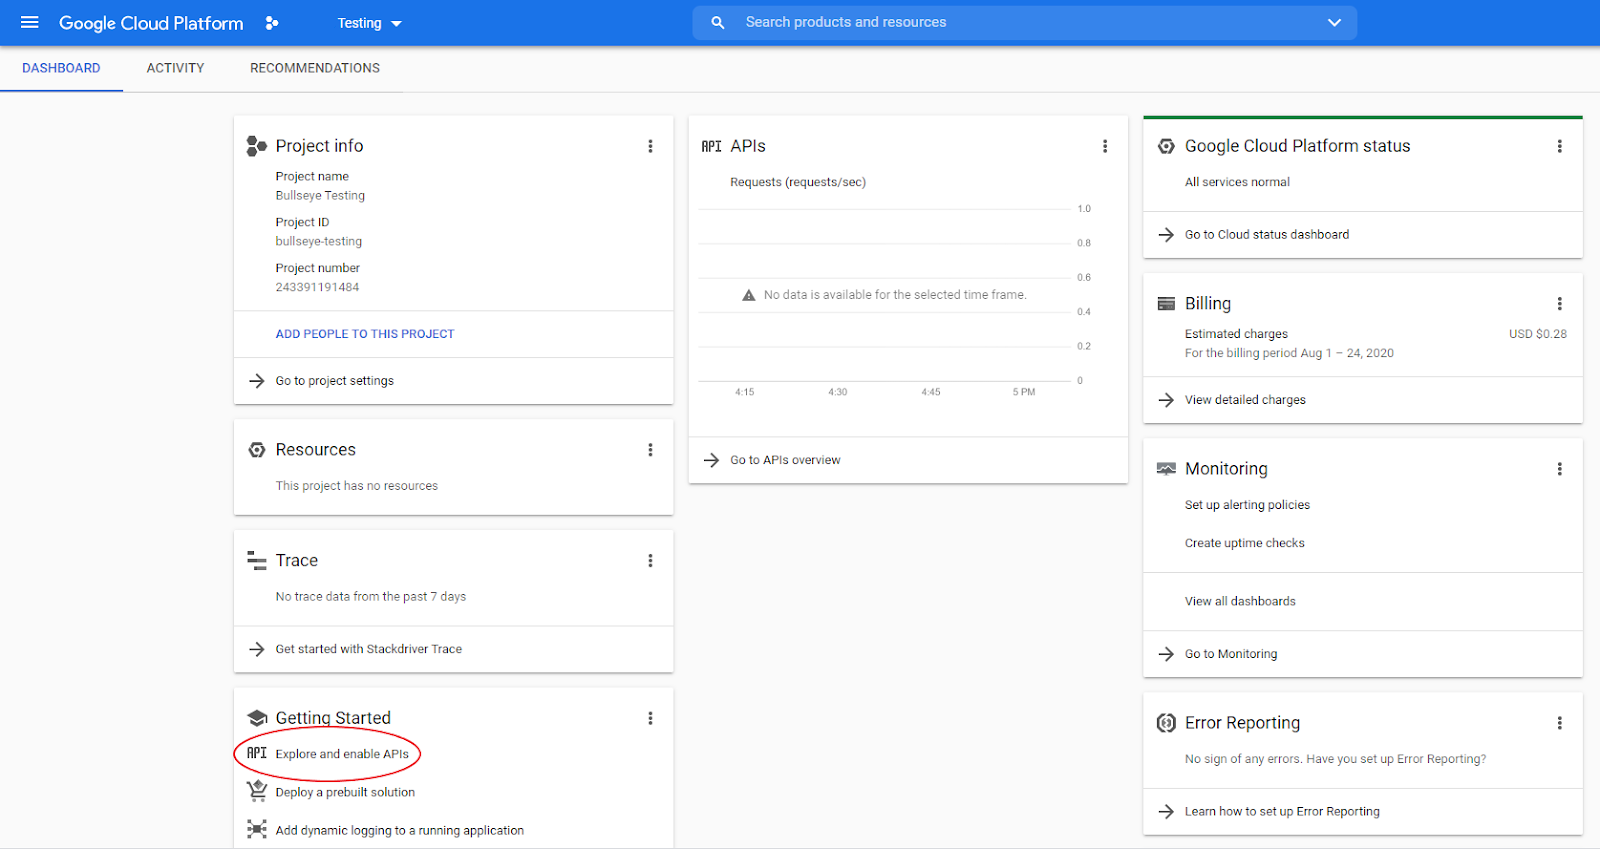
When you are creating a project for the first time, it will show that you don’t have any APIs available, and you’ll see a link to go to the API library. Select to go to the API library, or select the Library from the API & Services menu from the main navigation. . You’ll see a page that is like the one below. You’ll need to enable 2 or 3 APIs. You can simply locate APIs to enable by searching for them. To get started, browse for or select Maps JavaScript API:

You’ll get at a page similar to this after selecting an API:
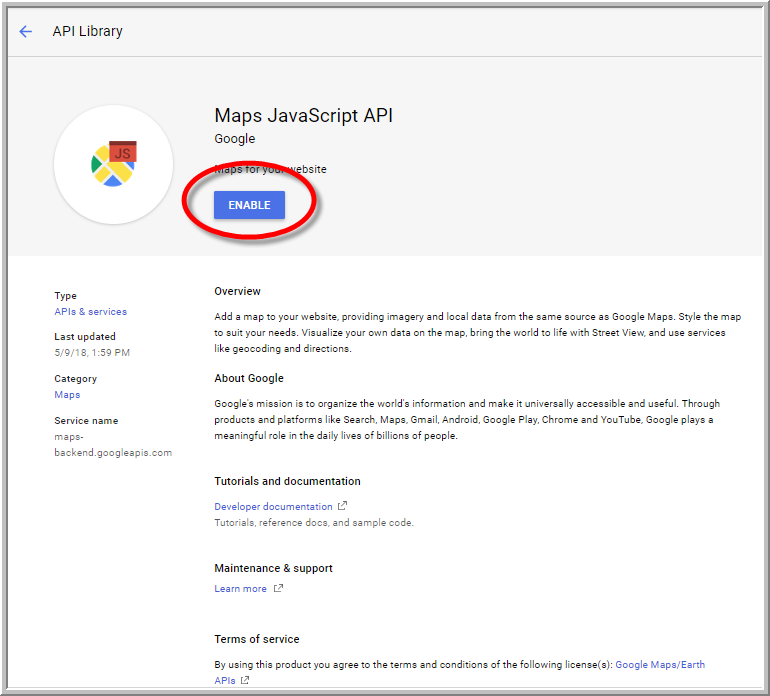
Select Enable. You will see a page like below. This page will display activity for the API when the API is used with a key.
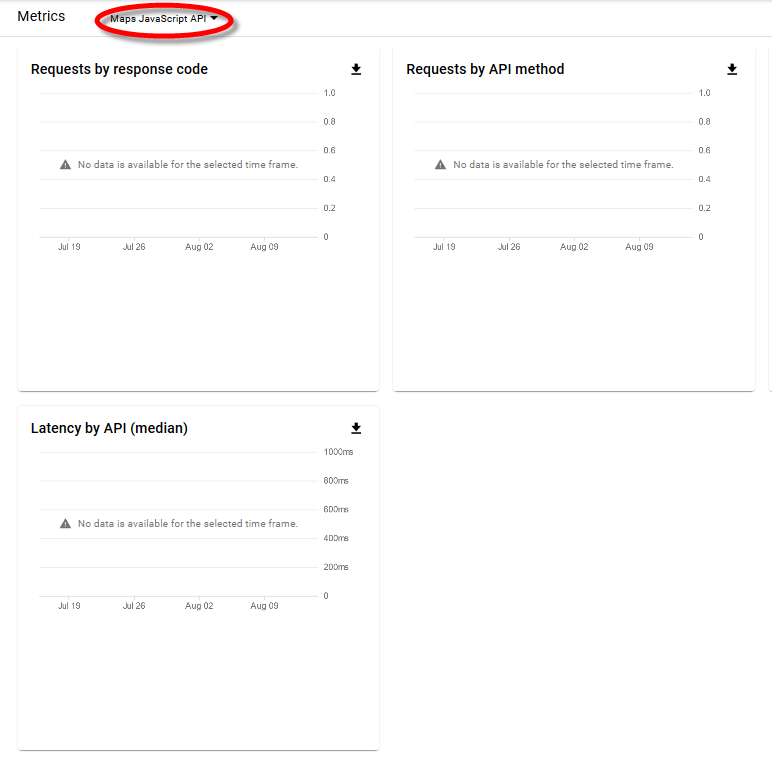
Return to the API Library to enable the Geocoding API in a similar method. Return to the API Library for a second time to enable the Places API if your locator will use Google’s address autocomplete functionality.
Create API keys
The next steps will be to create your credentials (keys), restrict access (assuming you want to set restrictions) to the Map JavaScript API to support maps for your Migrateshop interface and the Admin, and restrict access to the Geocoding API which let you get lat/long coordinates for your locations to plot on the map. Optionally, you could restrict access to the Places API which will support Google’s autocomplete functionality.
Select “Credentials” from the API & Services menu. You’ll see this screen:

Select “Create Credentials.” You will have the following:
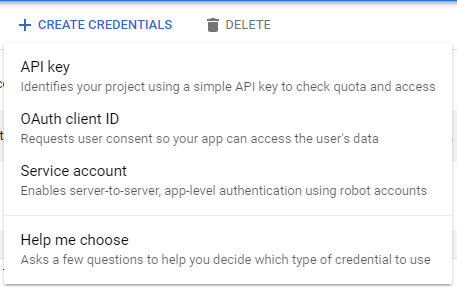
Select “API key” from the drop down menu. You’ll see this display:
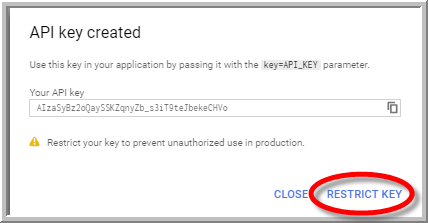
Close this popup if you don’t want to restrict your key and when you are done creating keys! See “Add Keys to Admin panel” following “Restrict API Keys” for the next step. If you want to restrict your keys, you will need to set up 2 API keys – one for mapping and one for geocoding. To generate a second key, repeat the previous steps. If you are set to add restrictions now, select “Restrict Key” and go on with the following instructions.
Restrict API Keys (optional)
To prevent unauthorized usage of your key, Google advises placing restrictions on it. We’ll start by demonstrating how to configure Website Restrictions for the mapping key.
Website Restrictions
Select Credentials from the APIs & Services menu, then select the key you’ll use for mapping. You’ll see a page like this:
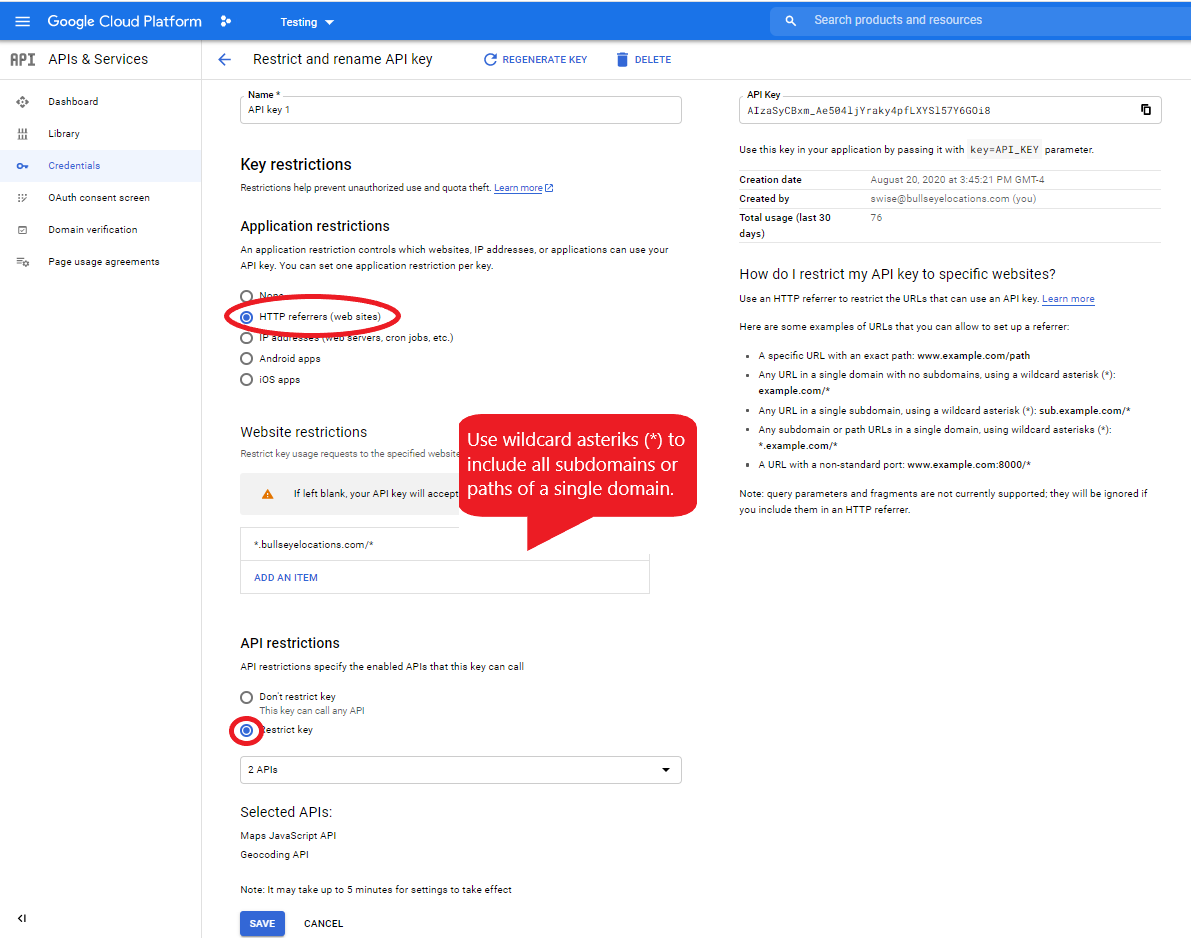
Under “Application restrictions” select HTTP referrers. Under Website restrictions, you’ll need to enter * .yoursite.com/*. If you are using a custom locator instead of Migrateshop standard Iframe-based, allow requests from the domain of the custom locator, or if your URL has a subdomain. Then you’ll need to allow requests from the entire URL or use wildcard asterisks.
When you input these URLs, you don’t need to include the HTTPS:
If you want to further restrict your key by API service, select Restrict Key under API restrictions. Select the Maps Javascript API and the Geocoding API (and optionally the Places API if your custom locator uses Google’s autocomplete functionality. Or the Distance Matrix API if you’re displaying driving distance on results)under the drop-down under Restrict Key. Select Save.
IP Restrictions
Select Credentials from the APIs & Services menu, then select the key you’ll use for geocoding. You’ll see a screen like this:
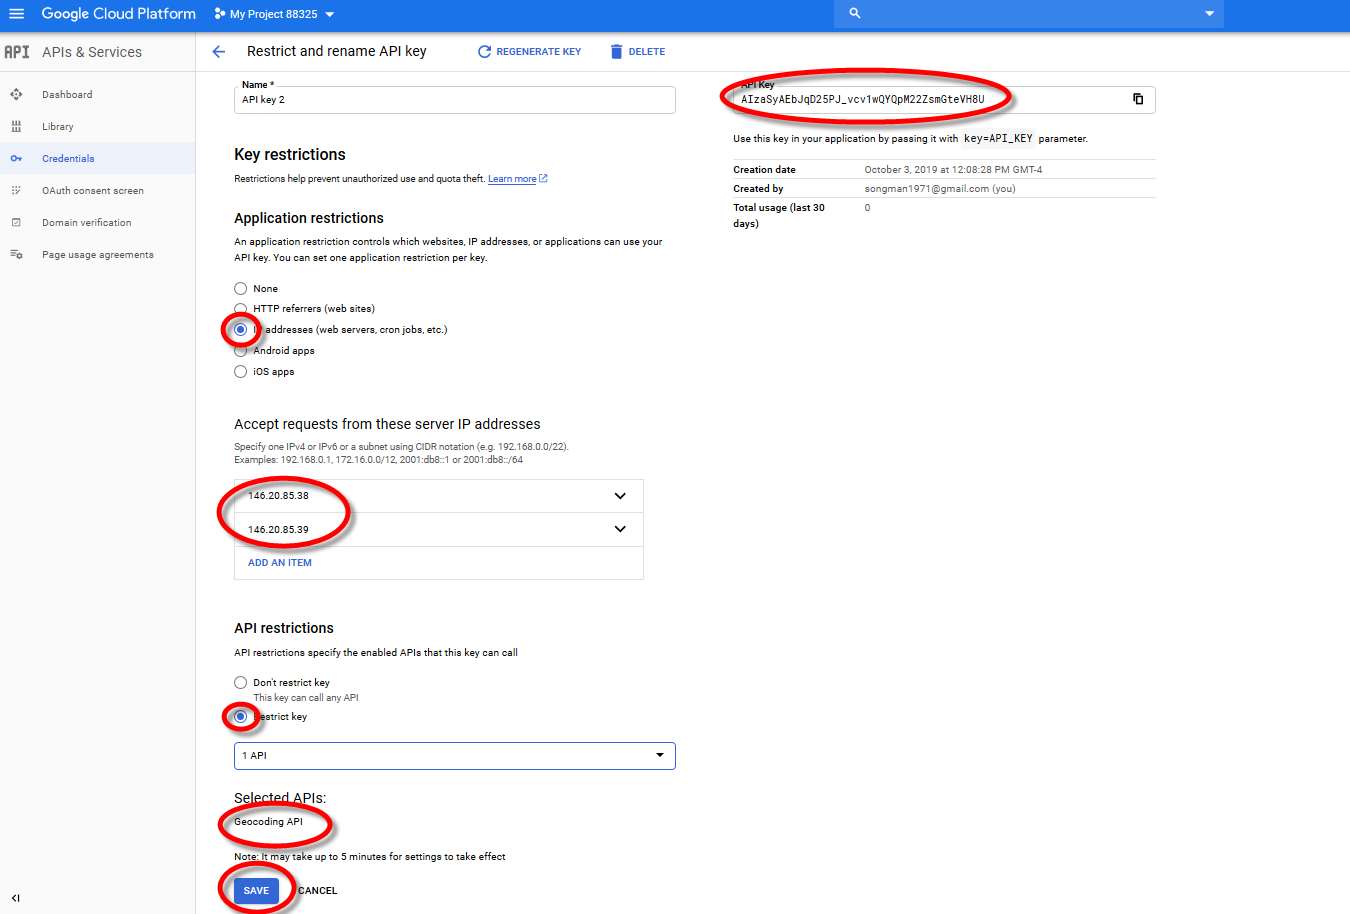
Under “Application Restrictions” select IP addresses. You have to enter 1 or 2 IP addresses. Many users enter locations by uploading them in a CSV file, or by typing them manually into the admin. If that is the case for you, enter 162.241.222.53 under “Accept Requests from these server IP addresses.” If your location maintenance will be done via automation via XML files or automated through CMS automation with applications like Salesforce.com. Then also enter (162.241.222.53) to that key’s restriction list.
Under API restrictions, select Restrict Key, and select the Geocoding API in the drop-down menu.
Copy the Key, and select Save at the bottom.
Add Keys to Admin panel
Copy the keys from the Credentials page and paste the API in admin panel
One more important step!
Make sure you Upgrade Your Trial Google Account to a Paid Account
It is general that clients will skip this step. And then in a year’s time ask why their maps generate an error. Because they never upgraded their account. In order to ensure that this step is not forgotten, we advise taking care of it during the initial setup process. Here are Google’s instructions for upgrading:
https://cloud.google.com/free/docs/gcp-free-tier#how-to-upgrade


